If you’ve ever been struck by the grandeur of nature during a camping or hiking trip and wished you could capture that moment with your camera, this article is for you. “Photography Tips for Camping and Hiking” is a handy guide that’s filled with practical advice on how to best immortalize those breathtaking panoramas and unique, fleeting wildlife encounters. From understanding the golden hours for lighting to selecting the right gear, the tips you’ll find here will ensure that your outdoor images are as unforgettable as the adventures you’re capturing.

Understanding Your Equipment
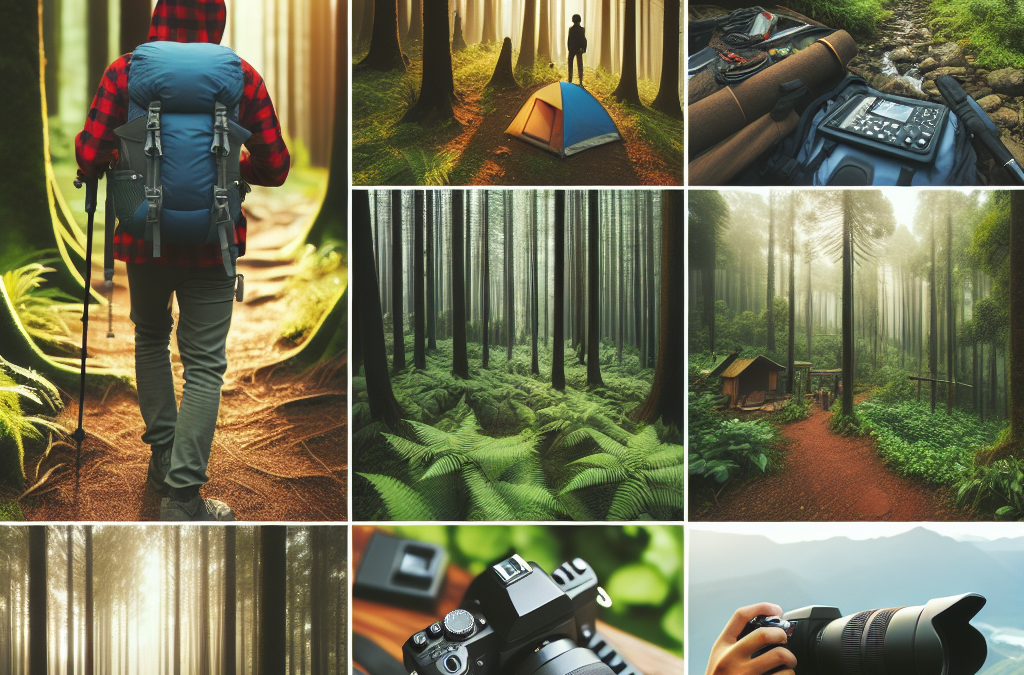
A photographer’s equipment plays an essential role in capturing breathtaking outdoor images while hiking or camping. Knowing your tools like the back of your hand can greatly enhance your production value.
Knowing Your Camera
Your camera is the most precious tool in your outdoor photography arsenal. Understanding its anatomy, from the lens to the aperture, is vital to creating compelling images. You should know the functions of each button, how to adjust your settings, and learn about different shooting modes. Spend time reading your camera’s manual and experimenting with different modes and make it your best friend.
Understanding Different Lenses
Not all lenses are made the same. Each has a specific purpose and understanding them can unleash your creativity. Wide-angle lenses are good for landscapes to capture expansive backgrounds. A telephoto lens is suitable for capturing wildlife from a safe distance. A macro lens comes in handy when you want to magnify minute details in nature.
Accessories for Outdoor Photography
The right accessories can elevate your photography game. Tripods can offer stability for long exposure shots or time lapses. Filters can enhance colors, buffer brightness, or magnify detail. Other handy accessories can be lens cleaning kits, remote shutter releases, and extra batteries for extended camping or hiking trips.
Understanding Camera Settings
Understanding camera settings plays a crucial role in capturing the perfect shot. This includes balancing ISO, aperture, and shutter speed. Knowing how to manipulate these according to different lighting conditions can significantly improve your photography.
Planning The Photography Trip
Planning is an essential step in ensuring a successful outdoor photography trip. Careful preparation can help you maximize your opportunities for great shots.
Assessing Weather Conditions
Checking the weather forecast before you head out can guide you in what gear to pack and what conditions to expect. Overcast skies are perfect for soft illumination in landscape photography; on the other hand, a bright, sunny day is good for high-contrast images.
Ideal Times for Outdoor Photography
Sunrise and sunset, known as ‘golden hours,’ provide the ideal lighting for stunning landscape shots. Midday, despite being bright, can offer exceptional conditions for striking black and white pictures due to hard shadows.
What to Pack
it’s important to pack wisely for outdoor photography. Besides your camera gear, remember essentials like water, snacks, compass/map, rain jackets, cold weather gear, and additional clothing layers.
Scouting Location in Advance
Doing research about your location beforehand is beneficial. Online searches, guidebooks, even Google Earth, can provide information about best spots, sunrise and sunset directions, and potential hazards.
Photographing Landscapes
Outdoor photography is an art. Understanding and utilising effective techniques will help you capture stunning images.
Composing the Image
Composition is crucial to creating engaging images. Use techniques like the rule of thirds or leading lines to draw the viewer’s eye into the photograph. Be creative, try different angles, and don’t forget to look up and down as well as straight ahead.
Using Natural Light
Natural light is a photographer’s best friend and also a challenge. It’s all about taking advantage of the right light at the right time. Harsh midday light can create hard shadows and bright highlights, while morning and evening light can bring warm, soft tones.
Capturing Different Times of Day
Different times of the day can add a unique touch to your pictures. Sunrise can bring cool, soft tones, high noon can provide minimalist black and white images, while sunset offers warm hues.
Incorporating Elements of the Environment
Incorporating elements of the environment like trees, rocks, or water bodies can create depth and context in your photos. These elements can be used as leading lines, frames, or points of interest.
Photographing Wildlife
Wildlife photography can be exhilarating, but it’s crucial to keep safety and ethics in mind.
Safety Tips When Shooting Wildlife
Always maintain a safe distance from wildlife. It’s essential not only for your safety, but also for the wellbeing of the animals. Never feed or disturb them, this is their home.
Capturing Action Shots
Capturing wildlife in motion can be tricky but rewarding. Fast shutter speeds can freeze the action, while slower speeds can add a sense of movement through motion blur.
Creating a Sense of Environment
Including some of the environment in your wildlife shots can give them a sense of place and make them more engaging. It helps viewers understand the animal’s habitat.
Patience and Timing in Wildlife Photography
Patience is key in wildlife photography. Much of your time may be spent waiting for the right opportunity. Be prepared, anticipate action, and be patient.

Aerial Photography
Aerial photography gives a unique perspective. Whether it’s a drone or a mountaintop, shooting from an elevated position can be captivating.
Drone Photography Tips
Drones have transformed photography. Remember to experiment with different altitudes, angles, and compositions. Play around with settings and learn how to use GPS and return-to-home functions for safety.
Regulations and Guidelines
Ensure you are aware of local regulations and guidelines when using drones. Respect privacy, wildlife protection areas, and no-fly zones.
Composing Aerial Shots
In aerial photography, composition is essential. Consider incorporating elements which can guide the viewer’s eye or provide a sense of scale.
Shooting at Different Heights
Different heights can produce different results. Lower altitudes can provide eye-level perspectives, while higher altitudes can create more panoramic or abstract views.
Photographing The Night Sky
Shooting the night sky can be mesmerising but requires understating of specific techniques to capture elusive celestial bodies.
Understanding Settings for Astrophotography
Understanding your camera’s settings is critical in astrophotography. Long exposure, high ISO, and wide aperture are key to shooting the night sky.
Tips for Shooting Stars and the Milky Way
Shooting stars and the Milky Way can be challenging. Use long exposures to capture the motion of the stars, and make sure you use a sturdy tripod to avoid camera shake.
Incorporating Landscape with Night Sky
Including some landscape in your astro photos can make them more engaging and provide a sense of scale and context for the viewer.
Long Exposure Photography
Long exposure photography allows you to capture the movement of the stars in the night sky, creating stunning star trail images. Always use a tripod!
Surviving The Elements
the outdoor environment can be tough, and it’s essential to protect yourself and your gear.
Protecting Your Equipment
Protect your gear against harsh conditions with weatherproof bags and cases. Cleaning equipment is useful to remove dust or moisture acquired during the shoot.
Dealing with Cold Temperatures
Cold can be a challenge, especially for your equipment. Keep batteries warm, as cold can drain battery life rapidly. Also, make sure you dress appropriately to keep warm.
Photographing in Wet Conditions
Rain might seem like a problem, but it can offer unique, reflective perspectives. Protect your camera with a plastic bag or waterproof case to prevent damage.
Handling Wind and Dust
Windy and dusty conditions can be dangerous for your camera. Try using your body or other physical barriers as a shield, or use a lens hood for additional protection.
Post Processing Tips
Good photos become great photos in the editing process. Post-processing is where your personal style can shine through.
Editing Landscape Photos
Edit your landscape photos by adjusting brightness, contrast, colors, and clarity. You can add drama to the sky, brighten the foreground, or enhance the colors of a sunset.
Correcting White Balance
Ensure the color temperature in your images is accurate by adjusting the white balance. It can be done during shooting, but also adjusted in post-processing if shooting RAW.
Using Contrast and Saturation
Boosting contrast can add depth and make your image more dynamic. Saturation adjustment can enhance colors, but be careful not to overdo it and lose detail.
Sharpening and Noise Reduction
Sharper images simply look better. Focus on significant elements in your image, and use noise reduction sparingly to avoid losing detail.
Astrophotography Processing Techniques
Astrophotography post-processing can include stacking multiple images for noise reduction, and enhancing the visibility of stars and constellations through contrast and brightness adjustments.
Sharing and Storing Photos
Once you’ve captured and refined your images, it’s time to store and share them with the world.
Back Up Strategies
Backing up your images is crucial to prevent loss of your hard work. Consider cloud storage, external hard drives, or even printing valuable images as additional security.
Maintaining Quality in Sharing
When sharing, be mindful of maintaining photo quality. Different platforms have different ideal image resolutions, so tailor your uploads accordingly.
Creating an Outdoor Photography Portfolio
Creating a portfolio is an excellent way to showcase and organize your work. Include your best images, and regularly update as you improve or diversify your content.
Sharing Hikes and Camps Photo on Social Media
Social media is a great platform to share your adventures with friends, family, and your audience. Captivating captions, locations tags, and hashtags can enhance reach and engagement.
Improving Your Photography Skills
Photography is a constant learning journey; continuous learning and self-improvement is the key.
Learning from Mistakes
Mistakes are opportunities for learning and growth. Acknowledge them, understand what went wrong, and use that knowledge to improve your future images.
Studying Master Photographers
One great way to grow as a photographer is by studying the work of masters. Analyze their compositions, lighting, and subject matter choices to understand their approach and style.
Continuous Learning and Improvement
Never stop expanding your knowledge. Books, tutorials, workshops, and simple practice can always help you learn more and become a more skilled photographer.
Joining Photography Groups or Classes
Joining a photography group or class is a good way to share tips, get feedback, and gain inspiration from fellow photographers. It provides an opportunity to connect with a community that shares the same passion for photography.
Remember, the beauty of photography is in sharing your unique perspective with the world. So get out there, start exploring, capturing, and learning from the vast open air studios of the great outdoors!