Building a clay oven in the wild can transform your outdoor cooking experience into an adventurous and rewarding endeavor. In this guide, you’ll learn step-by-step how to harness natural materials to create your very own clay oven. From gathering the essential components to crafting a functional and efficient design, you’ll discover the joy of primitive construction methods that connect you more deeply with nature. By the end, you’ll not only have a rustic oven but also an enhanced appreciation for outdoor survival skills and a newfound confidence in your ability to thrive in the wild. Have you ever considered cooking an authentic meal in the wild using a handmade clay oven? If you’re a nature enthusiast, an adventure seeker, or a DIY aficionado, then building your own clay oven in the wilderness might be the perfect project for you. Not only will it provide you with a unique cooking experience, but it also allows you to connect deeply with nature and traditional methods of food preparation.
Understanding the Basics of a Clay Oven
Before diving into the actual building process, it’s important to understand what a clay oven is and why it’s a practical solution for cooking in the wild.
What Is a Clay Oven?
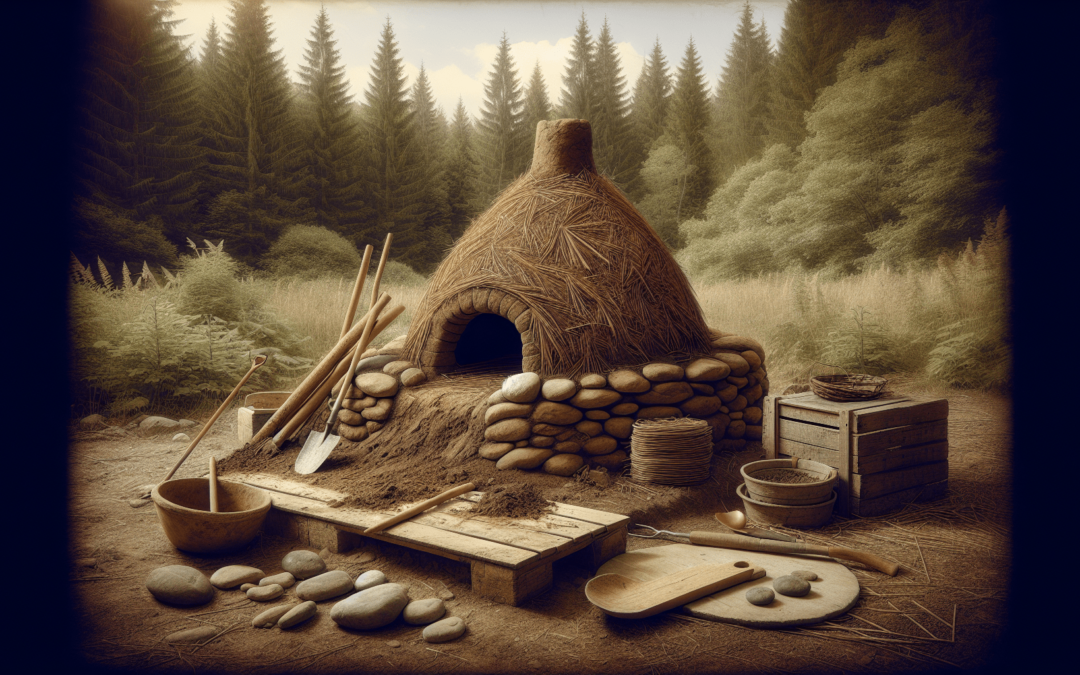
A clay oven, often referred to as an earth oven or cob oven, is a primitive cooking device that uses natural materials like clay, sand, straw, and water. These ovens have been used for centuries in various cultures around the world. They are known for their ability to retain heat, cook food evenly, and impart a unique, earthy flavor to baked goods and meals.
Why Build a Clay Oven in the Wild?
Building a clay oven in the wild has several benefits:
- Sustainability: Utilizes natural, readily available materials.
- Versatility: Perfect for baking bread, roasting meats, and cooking pizzas.
- Simplicity: Requires basic tools and minimal technical skills.
- Connection to Nature: Enhances your wilderness experience.
Gathering Your Materials
The first step in building your clay oven is gathering the necessary materials. This can be an adventurous task in itself, often requiring you to explore your surroundings.
List of Essential Materials
Below are the primary materials you’ll need to construct your clay oven:
| Material | Purpose |
|---|---|
| Clay | Main material for the oven structure |
| Sand | Combines with clay to form a sturdy mixture |
| Straw or grass | Provides structural integrity and insulation |
| Water | Acts as a binding agent |
| Bricks or stones | For the oven floor |
| Wooden door | To retain heat within the oven |
| Shovel, trowel, or hands | For mixing and shaping materials |
Finding Clay and Sand
- Clay: Look for clay-rich soil near riverbanks, creek beds, or construction sites. Wet clay feels sticky and malleable when you roll it around in your hands.
- Sand: Search for loose sand near shorelines or sandy areas. Sand prevents the clay from cracking when dried.
Harvesting Straw or Grass
For straw, you can often find dried grass in fields or meadows. Carefully cut and gather enough to mix with your clay. This adds strength and helps prevent cracking when the clay dries.

Site Selection and Preparation
Choosing the right location for your clay oven is crucial to its success. Consider factors such as accessibility, safety, and exposure to natural elements.
Selecting the Ideal Spot
- Flat Surface: Look for a level ground to ensure stability.
- Wind Protection: Choose a spot sheltered from strong winds to ensure even heating.
- Distance from Living Quarters: Keep a safe distance from tents or shelters to avoid potential fire hazards.
Preparing the Site
- Clear the Area: Remove any vegetation, rocks, and debris from your chosen spot. Ensure the ground is flat.
- Mark the Perimeter: Outline the size and shape of your oven using sticks or stones. A circular base with a diameter of about 3 feet is ideal.
- Create a Level Foundation: Lay a base of bricks or stones within the marked perimeter to provide a solid foundation for your oven.
Building the Oven: Step-by-Step Guide
Now comes the exciting part—building your clay oven! Follow these steps carefully to ensure a sturdy and functional oven.
Building the Oven Floor
- Arrange Bricks or Stones: Place your bricks or stones tightly together within the marked perimeter to form the oven floor. Ensure there are no gaps between them.
- Apply a Sand Layer: Spread a thin layer of sand over the bricks or stones. This layer helps insulate the oven floor and provides a level surface.
Mixing the Clay
A well-mixed clay is essential for a durable oven. Follow these steps to prepare your clay mixture:
- Combine Clay and Sand: Mix equal parts clay and sand in a wheelbarrow or on a tarp. The ratio can be adjusted based on the quality of your clay.
- Add Straw or Grass: Mix in straw or dried grass. Aim for a slightly less than equal part to the clay-sand mixture. This will add strength to the structure.
- Add Water: Slowly pour water into the mixture while stirring until it reaches a dough-like consistency.
| Ratio Guide |
|---|
| Clay : 1 Part |
| Sand : 1 Part |
| Straw : 0.75 Part |
| Water: As needed |
Shaping the Oven Dome
- Create a Sand Mound: Pile damp sand on the oven floor to form a dome shape. This mound will serve as a mold for the oven’s interior.
- Build Around the Mound: Apply your prepared clay mixture over the sand mound in layers, pressing it down to ensure a tight fit.
- Smooth the Surface: Once the dome is fully covered, use your hands or a trowel to smooth and even out the surface. The wall thickness should be about 4-6 inches.
- Create an Opening: Cut a doorway at the front of the dome, about 70% of the total height. This will be your oven entrance.
Drying and Removing the Sand Mound
- Allow to Dry: Let the clay dome dry for several days. The duration depends on the local climate, but dry and sunny weather is ideal.
- Remove the Sand Mound: Once the clay is dry and firm, gently dig out the sand mound through the doorway. Be cautious to avoid damaging the oven walls.

Curing the Oven
Curing your clay oven is essential for achieving its maximum durability and functionality. This process involves gradually heating the oven to strengthen and harden the clay.
Step-by-Step Curing Process
- Remove Moisture: Start with small, gentle fires. Place kindling and small pieces of wood inside the oven and light them. Allow the gentle heat to drive out any remaining moisture.
- Increase Heat Gradually: Over several days, gradually increase the size of the fires. This helps to evenly and thoroughly cure the clay without causing cracks.
- Final High-Heat Fire: Once the oven has cured sufficiently, build a larger fire to test the oven’s heat retention and ensure all moisture is expelled.
Using Your Clay Oven
Congratulations, your clay oven is now ready for use! Let’s explore how to effectively use your clay oven for cooking in the wild.
Preparing Your Oven for Cooking
- Preheat the Oven: Build a fire using dry wood. Let it burn for at least an hour to heat the oven thoroughly.
- Clear the Ashes: Once the oven is hot, push the fire to the sides or remove it completely. Use a thick cloth or broom to sweep out the ashes, leaving a clean cooking surface.
Cooking Tips and Techniques
- Baking Bread: Place the dough directly on the hot oven floor after removing the fire. Close the door to retain heat and bake evenly.
- Roasting Meats: Use a cast-iron skillet or place the meat on a wire rack inside the oven for a deliciously roasted flavor.
- Making Pizza: Cook pizzas directly on the oven floor. The high heat will produce a crispy crust and perfectly melted toppings.
| Cooking Method | Description |
|---|---|
| Baking Bread | Place dough on hot oven floor, close the door |
| Roasting Meats | Use cast-iron skillet or wire rack for roasting |
| Making Pizza | Cook directly on oven floor for crispy crust |
Maintenance and Troubleshooting
To keep your clay oven in good condition and extend its lifespan, regular maintenance and troubleshooting are necessary.
Maintaining Your Clay Oven
- Inspect Regularly: Check for any cracks or damage after each use. Small cracks can be repaired with a fresh clay mixture.
- Protect from Rain: Consider building a simple shelter over your oven or covering it with a tarp during rainy weather.
- Clean After Use: Regularly clear out ashes and debris to maintain a clean cooking environment.
Troubleshooting Common Issues
- Cracking: Minor cracks are normal and can be fixed with additional clay. For more extensive damage, consider rebuilding the affected section.
- Uneven Heating: Ensure your fires are evenly distributed within the oven. Regularly rotate your food for even cooking.
- Slow Cooking: If your oven takes too long to heat up, check for gaps or damage in the oven structure. Proper curing and insulation can help.
Embracing the Primitive Experience
Building a clay oven in the wild offers more than just a means to cook delicious meals; it’s a profound connection to ancient traditions and the natural world.
Benefits of the Experience
- Self-Sufficiency: Learn to rely on natural resources and traditional methods for your sustenance.
- Mindful Engagement: Engage all your senses as you gather materials, shape the oven, and cook in the wild.
- Satisfaction: Enjoy the rewarding feeling of eating food prepared with your own hands using an oven you built from scratch.
Final Thoughts
There’s a timeless charm to crafting and using a clay oven in the wild. Whether you’re baking bread, roasting meats, or making pizza, the experience will leave you with delicious meals and unforgettable memories. So, the next time you find yourself in the wilderness with some free time and a sense of adventure, consider building your own clay oven—it’s an endeavor well worth the effort!
As you sit around the warm, glowing clay oven, sharing stories and enjoying hearty meals with friends or family, you’ll realize that this ancient cooking method connects us all—to our past and to the natural world around us. So why not give it a try? The wild is calling, and a clay oven awaits your crafting hands. Happy building and bon appétit!