Embarking on the journey of making soap from natural ingredients is both exciting and rewarding. As you explore this process, you’ll discover how easy it is to create your own handmade soap using materials you likely already have at home. With a blend of creativity and a touch of patience, you can craft luxurious bars that are gentle on your skin and free from harsh chemicals. Get ready to dive into the world of natural soap making and enjoy the satisfaction of knowing exactly what goes into your skincare products! Have you ever thought about making your own soap using natural ingredients? It’s not only a fun and rewarding hobby, but it also allows you to control what goes into the products you use on your skin. If you’re looking for a way to reduce chemicals in your personal care routine or simply enjoy DIY projects, making soap from natural ingredients is a fantastic option to explore.

What is Natural Soap?
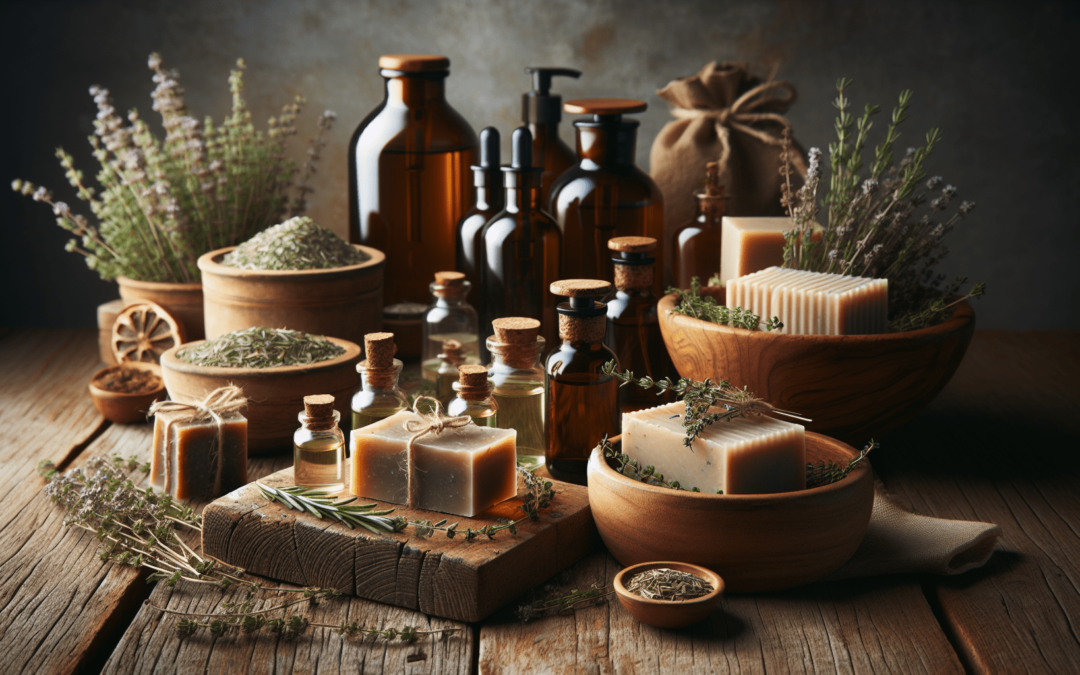
Natural soap refers to soap that is made from natural ingredients without synthetic additives. These ingredients often include plant-based oils, essential oils, natural colorants, and other organic components. Compared to commercially produced soaps, natural soaps are better for your skin and the environment.
Benefits of Natural Soap
There are countless benefits to making and using natural soap. Here are just a few:
- Skin-Friendly: Natural soap is often more gentle and moisturizing, making it ideal for people with sensitive skin.
- Eco-Friendly: Using natural ingredients means fewer chemicals are washed down the drain, benefiting both water supplies and aquatic life.
- Customizable: When you make your own soap, you can tailor it to suit your needs, preferences, and skin type.
Common Natural Soap Ingredients
Before we dive into the soap-making process, let’s get acquainted with some common natural ingredients you might use:
- Base Oils: Olive oil, coconut oil, palm oil, castor oil, and shea butter.
- Lye: Also known as sodium hydroxide, essential for soap saponification.
- Essential Oils: Lavender, peppermint, tea tree, and eucalyptus.
- Colorants: Turmeric, spirulina, cocoa powder, and beetroot powder.
- Additives: Oatmeal, coffee grounds, dried herbs, and clays.
The Science Behind Soap Making
Understanding the science behind soap making can enrich your experience and improve your results.
Saponification
The key chemical reaction in soap making is called saponification. This process occurs when fats and oils react with lye, transforming them into soap and glycerin. The basic formula can be summarized as follows:
Fats/Oils + Lye Solution = Soap + Glycerin
Importance of Lye in Soap Making
Lye, or sodium hydroxide, is an indispensable component in traditional soap making. It may sound intimidating, but when used correctly, it’s perfectly safe. Properly made soap contains no residual lye, as it fully reacts with the oils during saponification.
Superfatting
Superfatting refers to adding extra fats or oils to the soap mixture, which are left unreacted by the lye. This creates a moisturizing and skin-nourishing soap. Typically, soaps are superfatted between 5-15%, depending on the desired effect.
Getting Started: Tools and Safety
Before you start making soap, it’s crucial to gather the necessary tools and understand safety precautions.
Essential Tools
Here’s a table of essential tools for soap making:
| Tool | Purpose |
|---|---|
| Scale | Measuring oils, lye, and additives accurately |
| Digital Thermometer | Monitoring the temperature of oils and lye solution |
| Stick Blender | Mixing oils and lye to reach trace quickly and efficiently |
| Soap Molds | Shaping the final soap bars |
| Safety Gear | Protecting yourself (gloves, goggles, long sleeves) |
| Spatula | Scraping containers and stirring the mixture |
| Measuring Cups | Measuring oils, water, and additives |
| Heat-Resistant Containers | Mixing lye solution and combining ingredients |
| pH Strips | Testing the soap’s pH level for safety |
Safety First
Handling lye requires caution. Here are some safety tips to follow:
- Always wear gloves, goggles, and long sleeves.
- Work in a well-ventilated area.
- Add lye to water (not the other way around) to prevent exothermic reactions.
- Keep vinegar nearby to neutralize any accidental lye spills.
- Never use aluminum containers or utensils with lye, as it reacts with aluminum.
Basic Cold Process Soap Recipe
Cold process soap making is one of the most popular and straightforward methods. Here’s a basic recipe to get you started:
Ingredients
- 16 ounces olive oil
- 8 ounces coconut oil
- 4 ounces palm oil
- 2 ounces castor oil
- 4.8 ounces lye (sodium hydroxide)
- 11.2 ounces distilled water
- Essential oils (optional, typically 1-2 ounces depending on preference)
- Natural colorants and additives (optional)
Steps to Make Cold Process Soap
-
Prepare Your Workspace: Ensure all your tools and ingredients are ready. Safety gear should be on.
-
Weigh the Ingredients: Use a digital scale to measure the oils and lye accurately.
-
Mix the Lye Solution: Slowly add lye to the distilled water while stirring continuously. Set aside to cool.
-
Heat the Oils: Melt the coconut oil and palm oil. Combine with olive oil and castor oil. Heat to around 100°F.
-
Combine Lye and Oils: When both are within 10°F of each other, pour the lye solution into the oils. Mix gently.
-
Blend to Trace: Use a stick blender in short bursts until the mixture thickens to a light pudding consistency. This is known as “trace.”
-
Add Essential Oils and Additives: Blend in any additional ingredients like essential oils, natural colorants, or exfoliants.
-
Pour into Molds: Pour the soap batter into your prepared soap molds. Smooth the top with a spatula.
-
Insulate and Cure: Cover the molds and insulate with a towel. After 24-48 hours, remove the soap from the molds and cut into bars. Allow the soap to cure for 4-6 weeks in a cool, dry place, turning occasionally.
-
Test and Use: Test the soap’s pH to ensure it’s safe to use. Your handmade natural soap is now ready to enjoy!

Hot Process vs. Cold Process
Both hot process and cold process soap making have their unique benefits. Understanding the difference can help you choose the best method for your needs.
Cold Process Soap Making
- Pros: Smooth texture, more control over additives, visually appealing, preserves essential oil properties.
- Cons: Longer cure time (4-6 weeks).
Hot Process Soap Making
- Pros: Faster cure time (as little as 1 week), rustic appearance.
- Cons: Less time to work with additives, thicker texture harder to mold smoothly.
Comparison Table
| Feature | Cold Process | Hot Process |
|---|---|---|
| Cure Time | 4-6 weeks | 1 week (or less) |
| Appearance | Smooth, polished | Rustic, textured |
| Essential Oil Integrity | Better preserved | Can degrade due to heat |
| Additives Handling | More time to incorporate | Less time due to thick texture |
Customizing Your Soap
One of the most exciting aspects of making soap from natural ingredients is the ability to customize your creations.
Using Essential Oils
Essential oils offer not only pleasant aromas but also various skin benefits. Here are some popular choices:
| Essential Oil | Skin Benefits |
|---|---|
| Lavender | Calming, soothe skin irritations |
| Peppermint | Refreshing, cooling, relieve itchiness |
| Tea Tree | Antibacterial, antifungal, treats acne |
| Eucalyptus | Invigorating, antimicrobial |
| Geranium | Balances oil production, astringent |
Natural Colorants
Adding natural colorants can make your soaps visually appealing. Here are a few to consider:
| Colorant | Description | Usage Rate |
|---|---|---|
| Turmeric | Offers a range of yellow to orange | 1 teaspoon per pound of oils |
| Spirulina | Provides a range of green to blue | 1 teaspoon per pound of oils |
| Cocoa Powder | Delivers brown hues | 1 teaspoon per pound of oils |
| Beetroot Powder | Gives a pink to red shade | 1-2 teaspoons per pound of oils |
Exfoliants and Additives
Incorporating exfoliants and additives can add texture and skin benefits to your soap:
| Additive | Benefits | Usage Rate |
|---|---|---|
| Oatmeal | Gentle exfoliant, soothes skin | 1-2 tablespoons per pound |
| Coffee Grounds | Strong exfoliant, invigorates skin | 1-2 tablespoons per pound |
| Dried Herbs | Adds texture and natural aroma | 1 teaspoon per pound |
| Clays | Detoxifies skin, adds color | 1-2 teaspoons per pound |
Troubleshooting Common Soap Making Issues
Even the best-laid plans can go awry. Here are some common issues and how to resolve them:
Soap Won’t Trace
- Issue: Mixture remains thin despite blending.
- Solution: Check the temperature of oils and lye. Ensure they’re within 10°F of each other. Continue blending in short bursts.
Soap is Soft or Sticky
- Issue: Soap remains soft or sticky after curing.
- Solution: Insufficient lye or too much water. Double-check your measurements and allow more curing time.
Soap is Crumbly or Dry
- Issue: Soap crumbles when cut.
- Solution: Excessive lye can cause crumbly soap. Review your lye calculations using a soap calculator.
Soap Has White Spots
- Issue: White spots appear after curing.
- Solution: This could be lye pockets or soda ash. Ensure thorough blending to avoid lye pockets and insulate soap molds well to prevent soda ash.
Soap Seizes
- Issue: Soap mixture hardens rapidly.
- Solution: Rapidly reacting additives or fragrances can cause seizing. Work quickly and consider removing the problematic additive.
Cooling and Storing Your Soap
Proper cooling and storage ensures your soap lasts as long as possible while maintaining quality.
Cooling Process
- Once poured into molds, lightly cover the soap to protect it.
- Insulate wrapped molds with towels to retain heat and facilitate saponification.
- Unmold after 24-48 hours. If the soap resists, give it another day.
Storage Tips
- Store soap in a cool, dry, and well-ventilated area.
- Use a curing rack to allow air circulation around the soap bars.
- Turn soap bars weekly during the curing phase to ensure even drying.
- Once fully cured, wrap or store soaps in an airtight container to maintain fragrance and prevent moisture loss.
Getting Creative: Advanced Techniques
Once you’re comfortable with the basics, delve into advanced soap-making techniques for more creative and professional results.
Swirling Techniques
Swirling is a popular technique used to create intricate designs and patterns in soap. Here are a few methods:
- In-The-Pot Swirl: Pour different colored soap batter into the main pot, then pour into the mold while creating swirls.
- Drop Swirl: Pour different colors from a height to create a fine line design within the soap mold.
- Hanger Swirl: Use a hanger tool to create complex swirls inside a loaf of soap.
Layering
Creating layers adds visual interest and texture to your soap. To do this:
- Pour the first layer, allow a slight set, then pour the next layer.
- Alternate colors and textures for a striking effect.
Embeds and Impressions
Using embeds and impressions can further customize your soap:
- Embeds: Small pre-made shapes added to soap during the pouring stage.
- Impressions: Using textured mats or objects to imprint designs on soap surfaces.
Using Milk, Honey, and Natural Sugars
Incorporate nourishing ingredients like milk, honey, and natural sugars:
- Milk: Adds creaminess and moisture but requires careful temperature control.
- Honey: Adds natural sweetness and moisture but can increase heat, so use sparingly.
- Natural Sugars: Enhances lather but may caramelize, requiring watching temperatures.
Soap Cakes and Cupcakes
For a playful and creative touch, treat your soap as edible art with soap cakes or cupcakes:
- Layer cake-style soap with frosting textures for an appealing look.
- Use piping bags to create intricate designs resembling real cake toppings.
Conclusion: Enjoy the Art and Science of Soap Making
Making soap from natural ingredients is more than just a practical endeavor; it’s an art form brimming with creativity and scientific intrigue. Whether you’re seeking to eliminate synthetic products from your life or simply exploring a new hobby, soap making offers a unique and fulfilling experience. As you experiment with different techniques, ingredients, and designs, you’ll discover a whole world of possibilities, all while contributing positively to your skin and the environment. Enjoy your soap-making journey—happy crafting!